SHARK FIN JELLO CUPS
SUPPLIES: Blue Jell-O | Whip Topping {I used Cool Whip} | Small Dessert Cups {these are not what I used but would work nicely} | Gray Craft Foam | Plastic Spoons | Tacky Glue | Pencil | Scissors
TIP: One thing to keep in mind when buying your supplies – if your dessert cups are shallow you might want to buy shorter spoons. Otherwise, your shark fins are going to stick up very high above the Jello, and you will have to add tons of whip topping! Think about the proportion of the Jello and where you want the “fin” to sit in the cup once inserted.
Make the Jello according to package instructions and pour evenly into cups. One small package made three individual cups. Each dessert cup was a little less than 3/4 of a cup. One small package makes two cups of prepared Jello. Place in the refrigerator to set up.

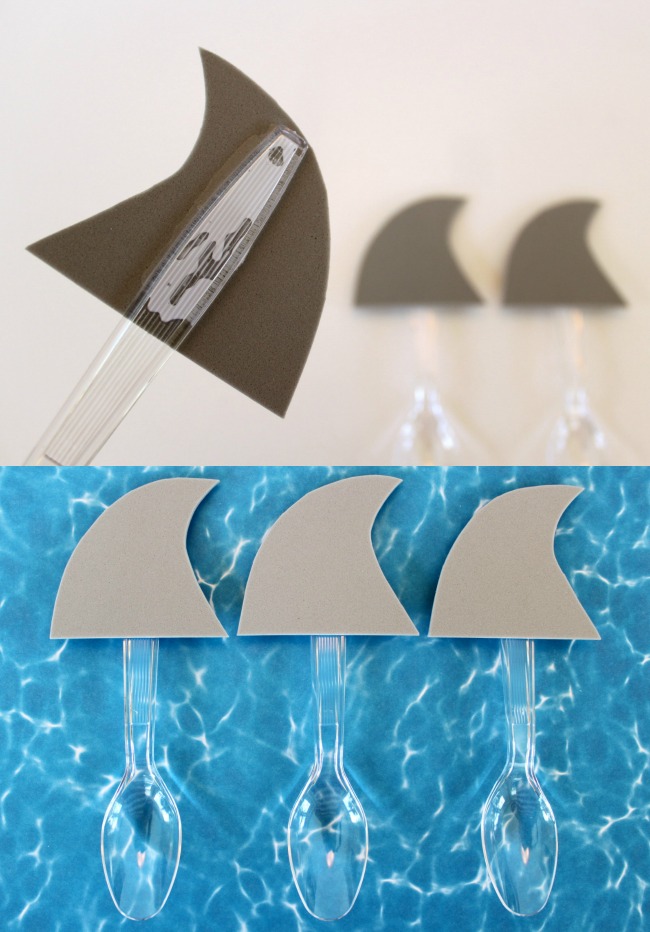
First, create a “fin” template out of white paper and used it to trace the fins onto the gray foam. That way they will all be the same size and shape. Then cut out the DIY foam shark fins and glue them on the tops of the spoons.
Once the fins have dried, insert the shark fin spoons into the jello cups. In the photo below you can see the spoons down through the center of the jello. I then gently spooned in the whipped topping on top and around the fins. If I had placed the topping on first, the spoon would have pushed the cool whip through the jello…I thought that would look a little messy.
Ingredients
- Blue Jell-O
- Whip Topping {I used Cool Whip}
Instructions
- Make the Jello according to package instructions and pour evenly into cups. One small package made three individual cups. Each dessert cup was a little less than 3/4 of a cup. One small package makes two cups of prepared Jello. Place in the refrigerator to set up.
- One thing to keep in mind when buying your supplies - if your dessert cups are shallow you might want to buy shorter spoons. Otherwise, your shark fins are going to stick up very high above the Jello, and you will have to add tons of whip topping! Think about the proportion of the Jello and where you want the "fin" to sit in the cup once inserted.
- First, create a "fin" template out of white paper and used it to trace the fins onto the gray foam. That way they will all be the same size and shape. Then cut out the DIY foam shark fins and glue them on the tops of the spoons.
- Once the fins have dried, insert the shark fin spoons into the jello cups. In the photo below you can see the spoons down through the center of the jello. I then gently spooned in the whip topping on top and around the fins. If I had placed the topping on first, the spoon would have pushed the cool whip through the jello...I thought that would look a little messy.